二维码是使用非常广泛,本文用TP5实现二维码和logo的生成与设置及路径保存等
下载qr_code插件
- 下载composer
- 利用composer 下载 qr_code 插件
composer require endroid/qr-code
我用的编译神器是PhpStorm ,所以在下面的Terminal中可以输入以上命令即可。如下图:

完成后可以在 Vender/endroid/qr-code 下找到安装好的文件。
代码撰写
生成简单的二维码图
最简单的看到二维码的代码如下,运行就可以在网页上看到,手机扫描,直接访问输入的网址。如下 index 控制器下的 Index.php
1
2
3
4
5
6
7
8
9
10
11
12
13
14
15
16
| <?php
namespace app\index\controller;
use Endroid\QrCode\QrCode;
use think\Controller;
class Index extends Controller
{
public function index()
{
$qrCode = new QrCode('http://www.baidu.com');
header('Content-Type: ' . $qrCode->getContentType());
echo $qrCode->writeString();
die;
}
}
|
生成简单的二维码效果如下图所示:
生成复杂的二维码图
有时候使用二维码的时候,除了内容外,还是需要对二维码进行一定的设置,比如二维码的大小,颜色,边框等;还有logo的添加,logo的大小等。二维码图片存放位置等。
前提:在使用一下代码前,保存二维码需要给二维码个路径(否则无法保存文件流),需要logo的话,还要提供logo的路径。
假如你已经提供了以上两个路径。下面就把生成二维码封装成了一个函数,代码如下:
index控制器下的Index.php :
1
2
3
4
5
6
7
8
9
10
11
12
13
14
15
16
17
18
19
20
21
22
23
24
25
26
27
28
29
30
31
32
33
34
35
36
37
38
39
40
41
42
43
44
45
46
47
48
49
50
51
52
53
54
55
56
57
58
59
60
61
62
63
64
65
66
67
68
69
70
71
| <?php
namespace app\index\controller;
use Endroid\QrCode\ErrorCorrectionLevel;
use Endroid\QrCode\LabelAlignment;
use Endroid\QrCode\QrCode;
use think\Controller;
class Index extends Controller
{
public function index1()
{
$code_content = 'https://firmovebrick.github.io/';
$code_name = 'Pandada_code';
$code_logo = 'static\1.jpg';
$code_logo_width = 40;
$code_img = self::getQrCode($code_content, $code_name, 200, $code_logo, $code_logo_width);
$data = [
'code_img' => $code_img,
'code_name' => $code_name,
];
$this->assign('data', $data);
return $this->fetch('index/index');
}
public static function getQrCode($code_content, $code_name, $code_size = 100, $code_logo = '', $code_logo_width = 20, $code_font = null)
{
$qr_code = new QrCode($code_content);
$qr_code->setSize($code_size);
$qr_code->setMargin(10);
$qr_code->setWriterByName('png');
$qr_code->setEncoding('UTF-8');
$qr_code->setErrorCorrectionLevel(ErrorCorrectionLevel::HIGH());
$qr_code->setForegroundColor(['r' => 0, 'g' => 0, 'b' => 0, 'a' => 0]);
$qr_code->setBackgroundColor(['r' => 255, 'g' => 255, 'b' => 255, 'a' => 0]);
if ($code_font) {
$qr_code->setLabel('Scan the Code ', 16, __DIR__ . '字体地址', LabelAlignment::CENTER);
}
if ($code_logo) {
$qr_code->setLogoPath($code_logo);
$qr_code->setLogoWidth($code_logo_width);
$code_path = 'static/qrcode/' . $code_name . '.png';
$qr_code->writeFile($code_path);
} else {
$code_path = 'static/qrcode/' . $code_name . '.png';
$qr_code->writeFile($code_path);
}
header('Content-Type: ' . $qr_code->getContentType());
$qr_code->writeString();
return $code_path;
}
}
|
index.html
1
2
3
4
5
6
7
8
9
10
11
12
13
14
| <!doctype html>
<html lang="en">
<head>
<meta charset="UTF-8">
<meta name="viewport"
content="width=device-width, user-scalable=no, initial-scale=1.0, maximum-scale=1.0, minimum-scale=1.0">
<meta http-equiv="X-UA-Compatible" content="ie=edge">
<title></title>
</head>
<body>
<img src="{$data.code_img}" alt="">
<div>{$data.code_name}</div>
</body>
</html>
|
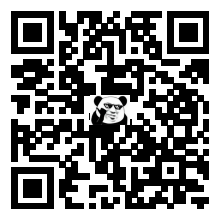
运行后就会在页面上显示自己的二维码。如下图:
在这里需要注意的是,为了方便小编把处理数据的数据写在了Controller里面,记得在实际开发项目中得把方法放在模型中,需要调用直接实例化模型对象就好了。
参数介绍
1
2
3
4
5
6
7
8
9
10
| setSize -- 二维码大小 px
setWriterByName -- 写入文件的后缀名
setMargin -- 二维码内容相对于整张图片的外边距
setEncoding -- 编码类型
setErrorCorrectionLevel -- 容错等级,分为L、M、Q、H四级
setForegroundColor -- 前景色
setBackgroundColor -- 背景色
setLabel -- 二维码标签
setLogoPath -- 二维码logo路径
setLogoWidth -- 二维码logo大小 px
|
想要了解更多,大家可以查看这个网址:qr_code插件使用教程